

Cost routing
Cost routing sends model:"auto" to a cheap model for easy prompts and a strong model for hard ones — at a quality you choose. It's where the real savings are: most everyday prompts don't need your most expensive model, and cost routing spots the ones that do.
Who can do this
Org admins (for their organization) and platform admins, on Projects → Cost Routing. Requires the semantic add-on. Default off. Uses the same auto model trigger as Auto Routing — enable only one per project.
How it works
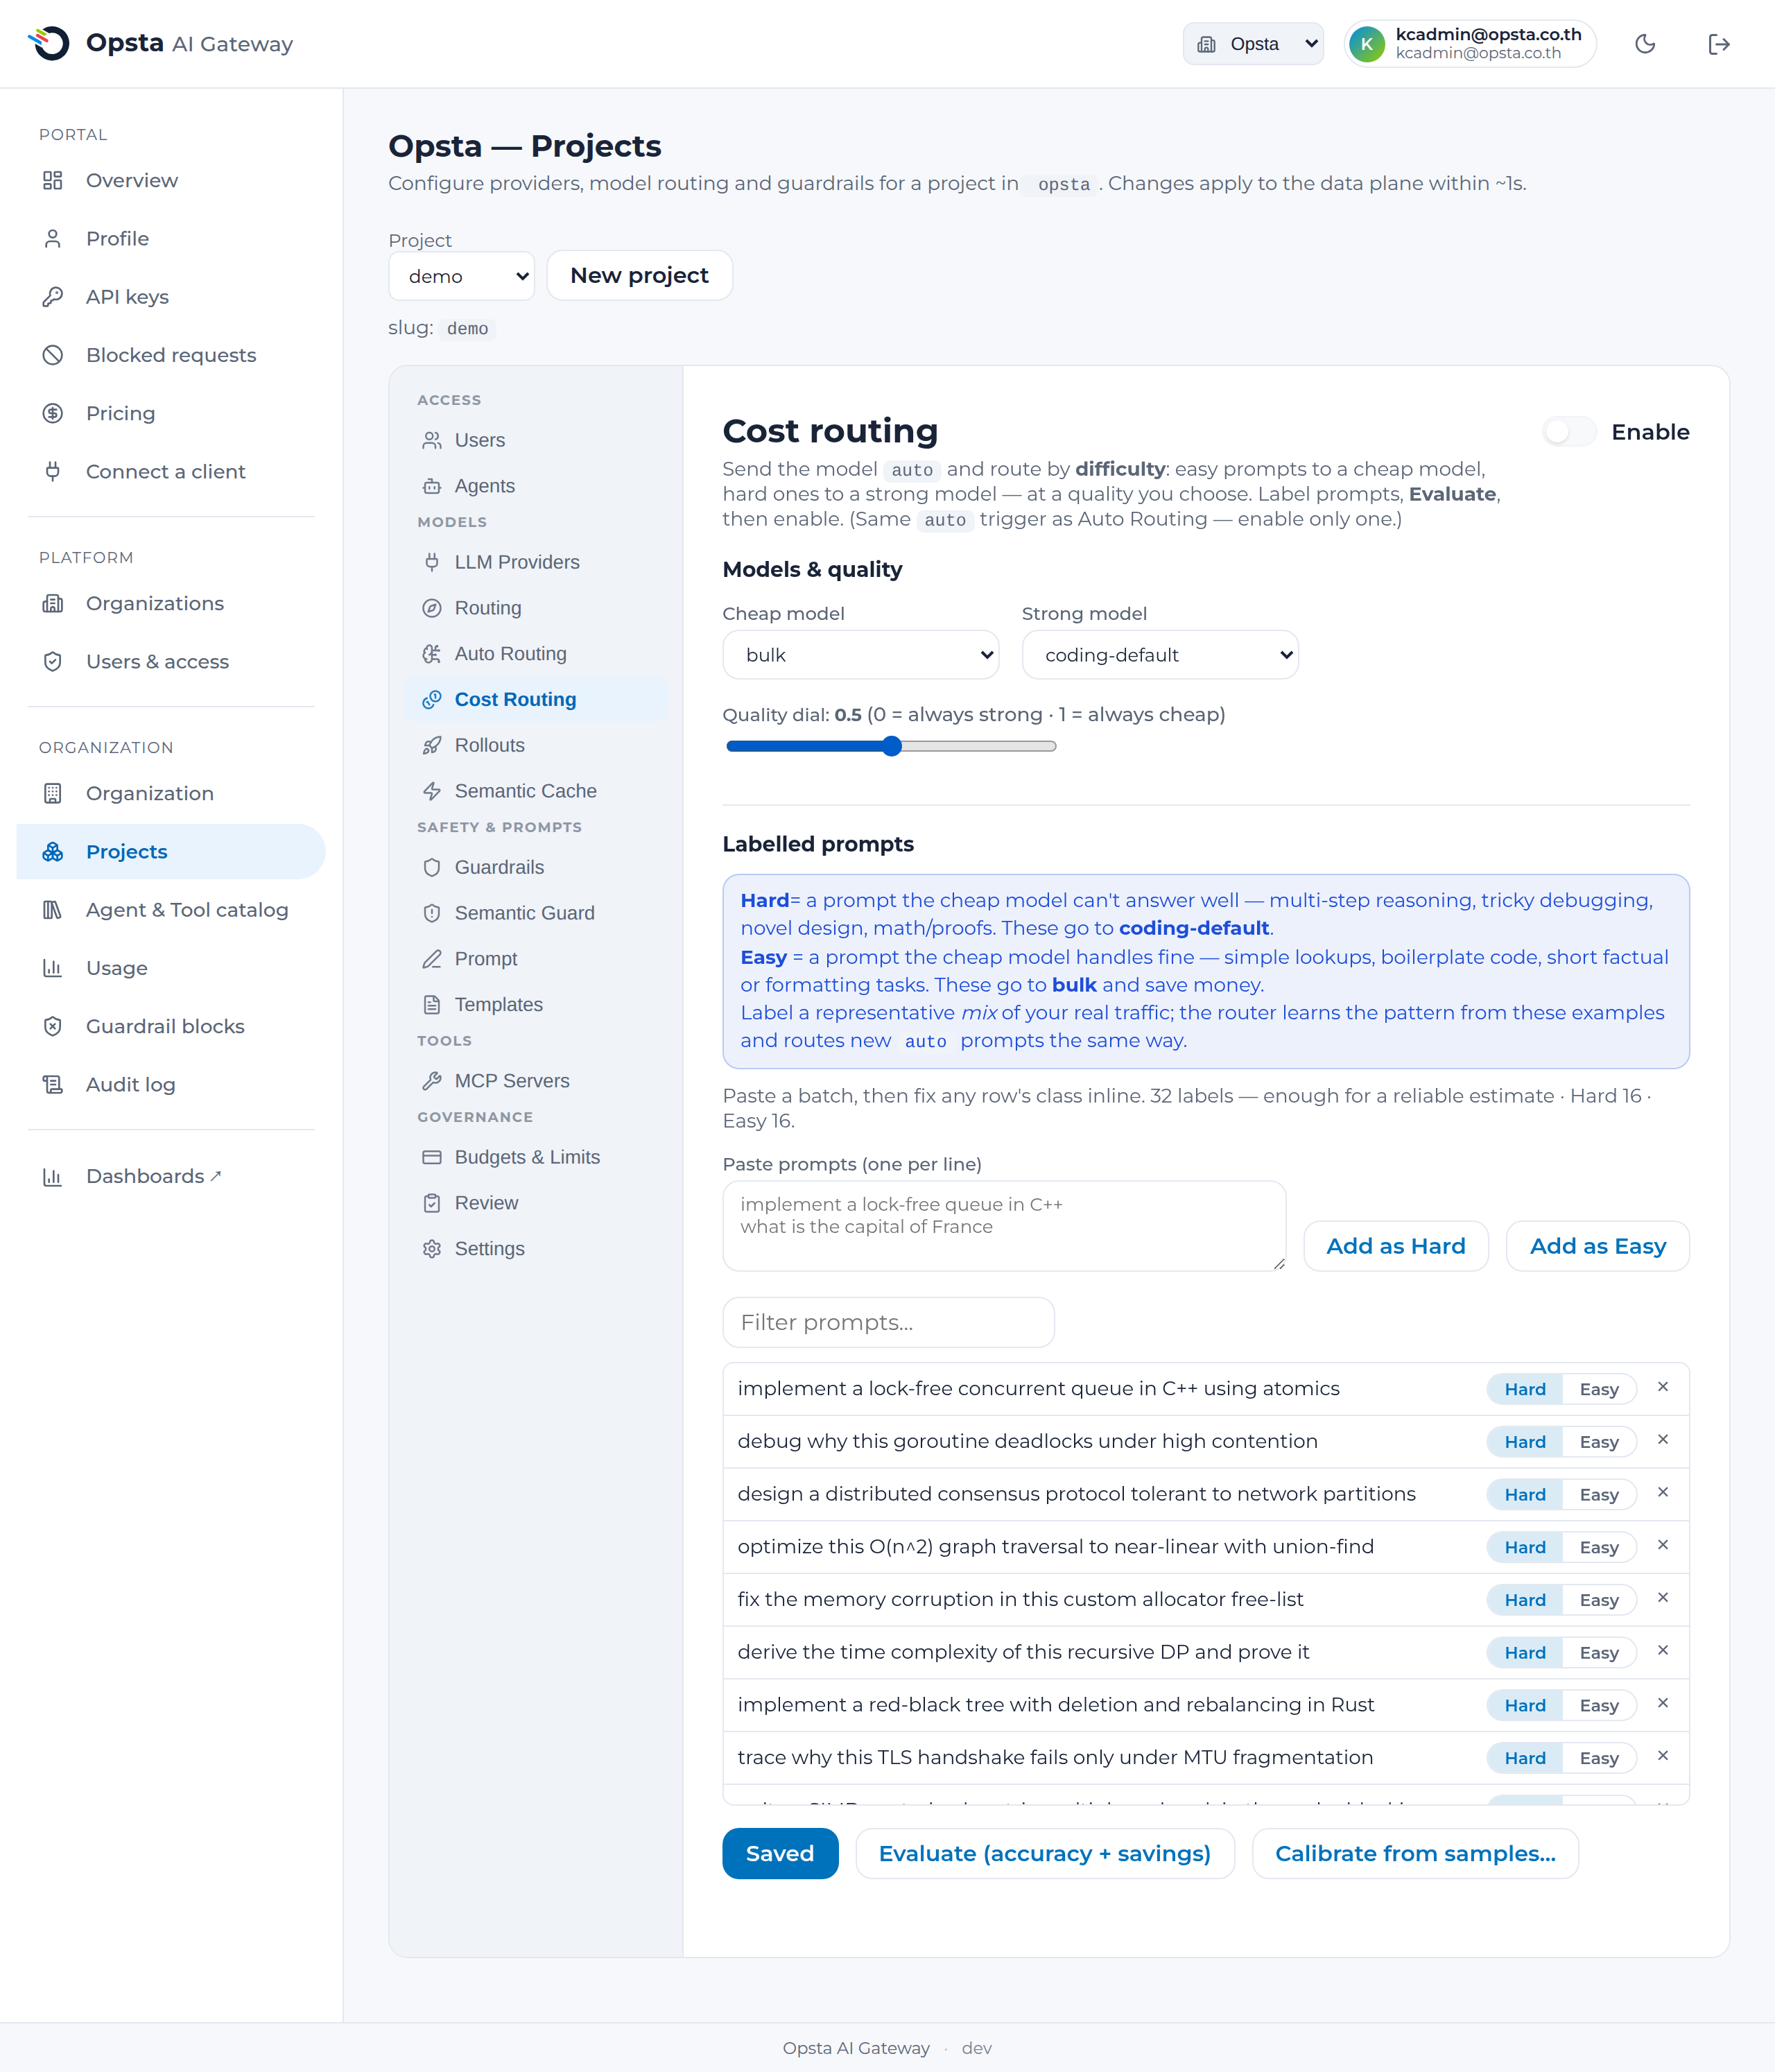
You label a few dozen prompts as hard (needs the strong model) or easy (the cheap model is fine). The gateway embeds them and, for each live model:"auto" request, finds the nearest labelled prompts by meaning and takes a weighted vote: if the prompt looks at least as hard as your quality dial allows, it routes to the strong model; otherwise the cheap one. It fails toward the strong model — a transient hiccup or an unfamiliar prompt never silently downgrades quality.
This is a difficulty predictor, not a cascade: each request is routed once, with no added latency.
Set it up
- Open Projects → Cost Routing.
- Pick a cheap model and a strong model (from the project's models).
- Set the quality dial —
0= always strong (max quality),1= always cheap (max savings),0.5= escalate when a prompt looks at least median-hard. Start around 0.5 and tune. - Add labelled prompts: a column of hard prompts and a column of easy ones, representative of your real traffic. A few dozen of each works well. Or click Calibrate from samples (below).
- Evaluate before enabling (next section), then tick Enabled and Save.
Evaluate before you trust it
Evaluate runs a held-out check over your labels and reports:
- routing accuracy — how often it would send the truly-hard prompts to the strong model;
- % routed cheap — the share of traffic that would take the cheap path at your dial;
- estimated savings — versus always using the strong model (set per-token prices on both models to see this).
Because accuracy depends on how representative your labels are, this lets you decide with real numbers rather than on faith. Adjust the dial or add labels and re-evaluate until you're happy, then enable.
Calibrate from samples (auto-labelling)
Don't want to hand-label? Calibrate from samples does it for you: paste representative prompts, and the gateway runs each on your cheap and strong models and asks the strong model to judge whether the cheap answer was good enough — labelling each hard or easy automatically. These calls go through the gateway, so they're governed and metered (you provide one of your API keys to run them). Up to 20 prompts per run; run it again to add more.
Client usage
Clients send auto exactly as before — nothing changes on their side:
curl https://api.<your-domain>/v1/chat/completions \
  -H "Authorization: Bearer $KEY" \
  -d '{"model":"auto","messages":[{"role":"user","content":"what day comes after Monday"}]}'